|
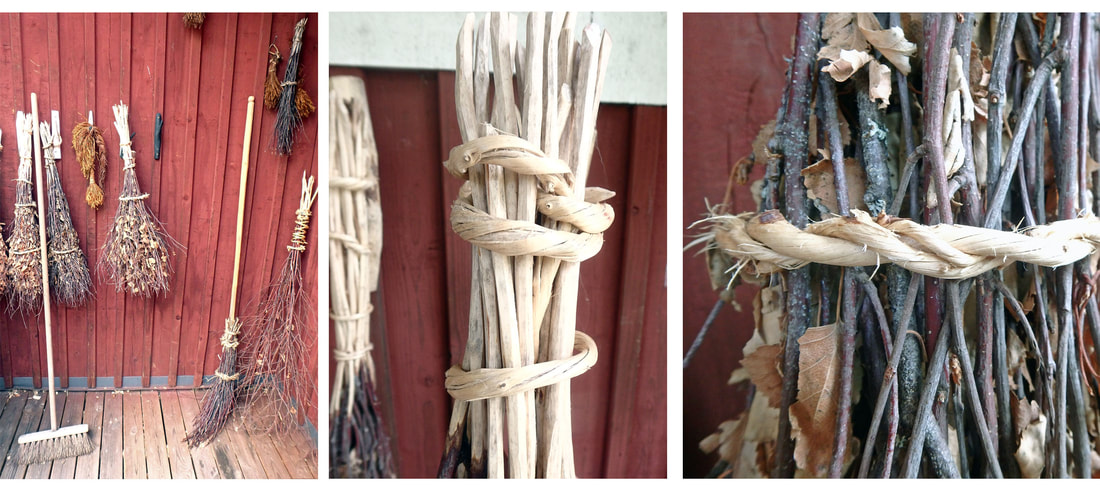
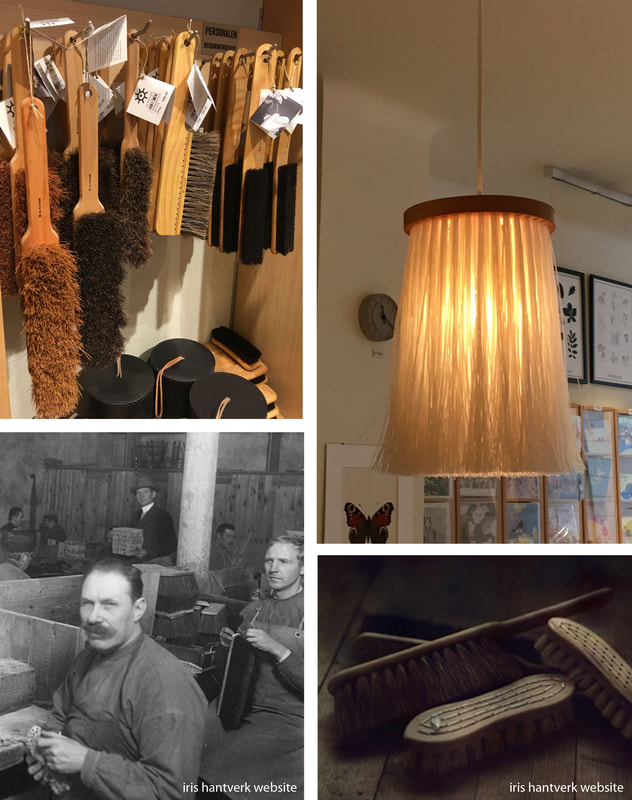
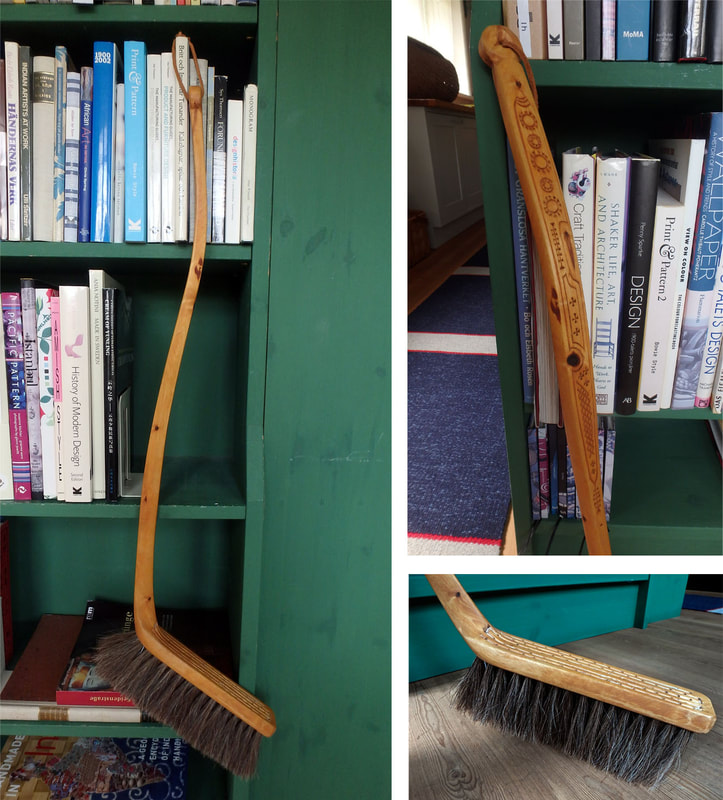
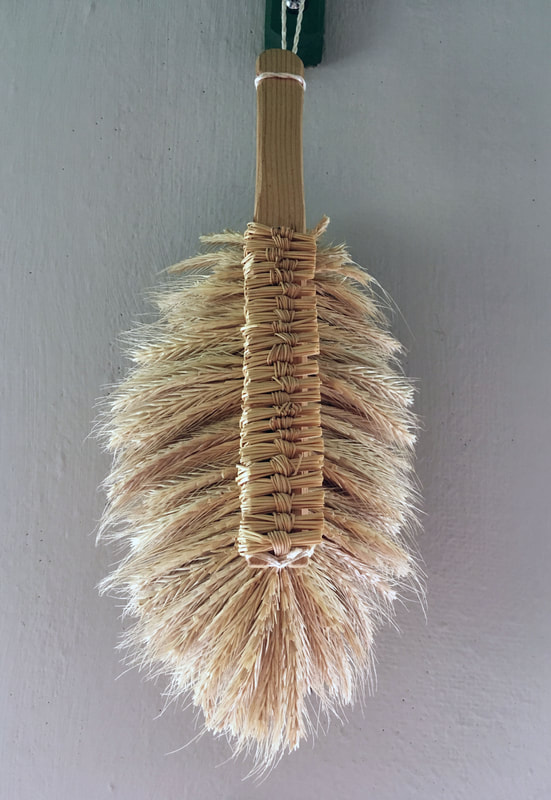
Hello from Sweden! I’m exactly half way through my time abroad and I’ve already visited many cultural history and folk museums, swerved around sheep napping in the road, taken a course with Per Helldorff at Sätergläntan Institute for Sloyd and Handcraft, visited the farm in Norway that was owned by my great-great-great grandparents, had a crash course in making peeled birch brooms with Ulk Eckardt, hiked Besseggen Ridge (considered by many to be the “most beautiful” hike in Norway), spent a weekend at Täljfest taking workshops from David Fisher, Beth Moen and Helena Åberg, and have over 2,000 photos of objects, places and experiences that I’ve found inspirational. One of the subjects that has been unexpectedly exciting for me here is the many ways I’ve encountered the intersection of traditional woodworking and broom-making in Norway and Sweden. Coming into the Artisan Development Program, I was mostly making my living as a broom-maker, however I wanted to focus on wood carving and woodturning during my two years in the program. I’ve continued making brooms throughout this time, though, and really enjoy finding ways to incorporate various carving methods and woodworking techniques into broom-making. Many of the brooms that caught my attention upon arriving are not something that many of us would even consider brooms – they were just a bundle of thin birch branches tied together with another branch that had been twisted to loosen the fibers and make it more pliable. Sometimes these brooms are just bundles of branches a few feet long so one can hold the top of the bundle and barely stoop to sweep the ground with the ends of the branches, but I’ve also seen a few occasions where these bundles have been fastened to a larger stick or dowel to create something a bit closer to what I generally picture when I think of a broom. Brooms made completely from wood! I was trying to explain the main style of floor broom that I make to one of my fellow students at Sätergläntan a couple weeks ago. It took a bit of time, but finally her eyes lit up and she continued on to tell me a story about how, growing up in Sweden, she had never seen a broom that consisted of broomcorn (or another similar fiber) simply tied onto a handle. All of the brooms in her life were more similar to a push broom with the sweeping fibers attached to a horizontal block of wood that was then fastened on the end of a dowel. It wasn’t until she was a teenager when her mother brought back a broom after a trip to the US, that she saw anything resembling what I make. Through our continued conversation about brooms in Sweden, I came to be aware of a company here called Iris Hantverk. This company, in various forms, has been around and making brooms since 1870, and for this entire history, the workforce has consisted of people who are visually impaired. The company is based in Stockholm, so I had the opportunity to visit one of their stores. Nothing was made using broomcorn, but they have a myriad of other fibers that are used, including something referred to as “cereal root,” or “rice root.” My brain quickly jumped to the idea of trying to use wild rice root to make a similar product, but I am fully aware that pulling up a wild rice plant is illegal in Minnesota, so that won’t be happening! I also later found out that it is not actually the root of rice plants, but the root of a grass referred to as “zatacon,” though I cannot find any further information on the Latin name of this so called grass and it’s driving the agrostologist part of me crazy! But in light of this information, the wild rice roots probably wouldn’t have worked anyway. I’m not struck by the machined aesthetics of the wood used in Iris Hantverk brooms, however this method of broom making is completely new to me and I’m hoping to take inspiration from their methods and materials and explore some similar hand-carved versions. A selection of photos from their shop and website are below, and you can also check out the English version of their website, which is very thorough and interesting, at: https://www.irishantverk.se/en. Oh, and they even had broom inspired lighting in their store – the picture is below! On my last day of class at Sätergläntan, I approached my instructor, Per Helldorff, about getting into the library. I had heard what bordered on legends about the books and items in that building and on more than one occasion during the week, had stopped by to peer into the windows and marvel from afar. My classmates were much more interested in their projects than in the library, so Per and I headed over after lunch. He had told me about a broom that used to be in the library that had been made by Wille Sundqvist, but said he hadn’t seen it in many years and thought it might be gone. I remembered when Jögge Sundqvist was teaching at North House last year he mentioned to me his father having made some brooms, but didn’t say much more and I had wrongfully assumed they were the peeled birch brooms. After a few minutes rustling around in a back room, Per emerged with a truly amazing creation. Measuring just below waist height, this broom had a shape vaguely resembling a hockey-stick (but oh so much more elegantly curved), with horsehair fibers sewn along the “blade.” The handle was chip carved in a style very similar to the spoons that I’ve seen of Wille’s, and of course, it felt magical to use and worked like a charm. I spent quite a bit if time poking around the library, marveling at all of the amazing books and handcraft, and it was so hard to pry myself away from that broom, especially knowing that my time studying it was very likely a once-in-a-lifetime opportunity. I told Per that I wanted to trace it on a huge sheet of paper so I could capture the elegant curves, but his response was “Oh, it’s not so hard. Just go find a tree that has the right shape – but not here, the students have cut down all the good trees.” I did take a lot of photos, and now my eye will be looking for something a little different on my treks in the forest looking for broom handles. It continues to amaze me how frequently my dual identity as a broom-maker and woodworker come crashing together in ways that help me realize that perhaps I’m on to something…
Oh, and as a final note, check out this other amazing broom I came across hanging on the wall in the Sätergläntan library. I don’t know the story, but it left me speechless! And since my sweetheart is a baker, a broom made from cereal grain would be completely appropriate in our lives.
1 Comment
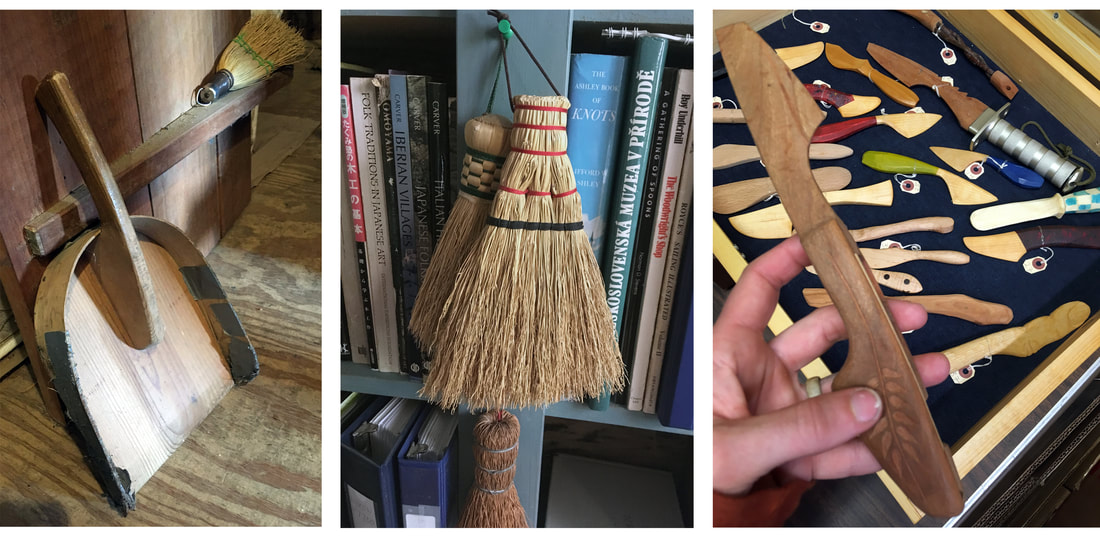
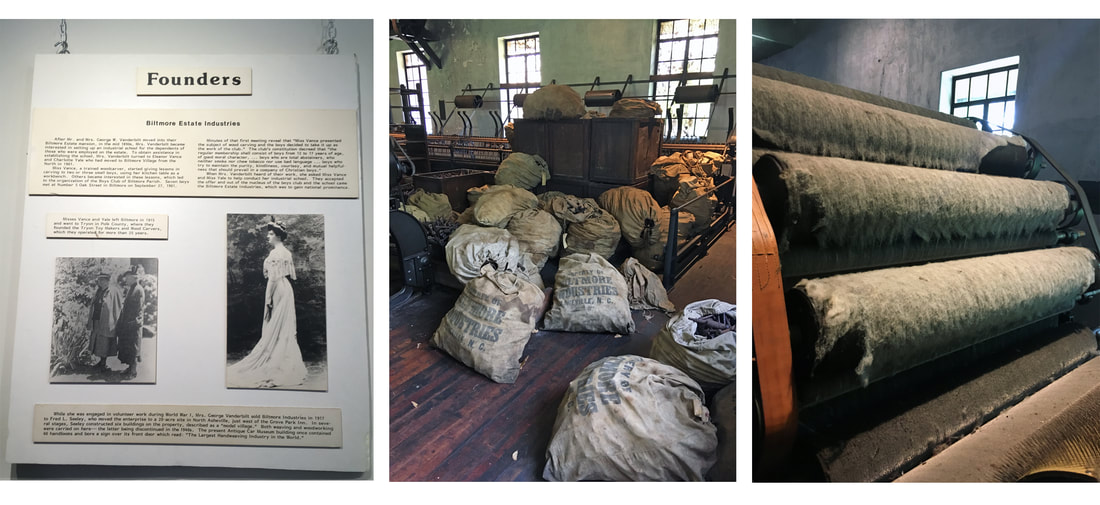
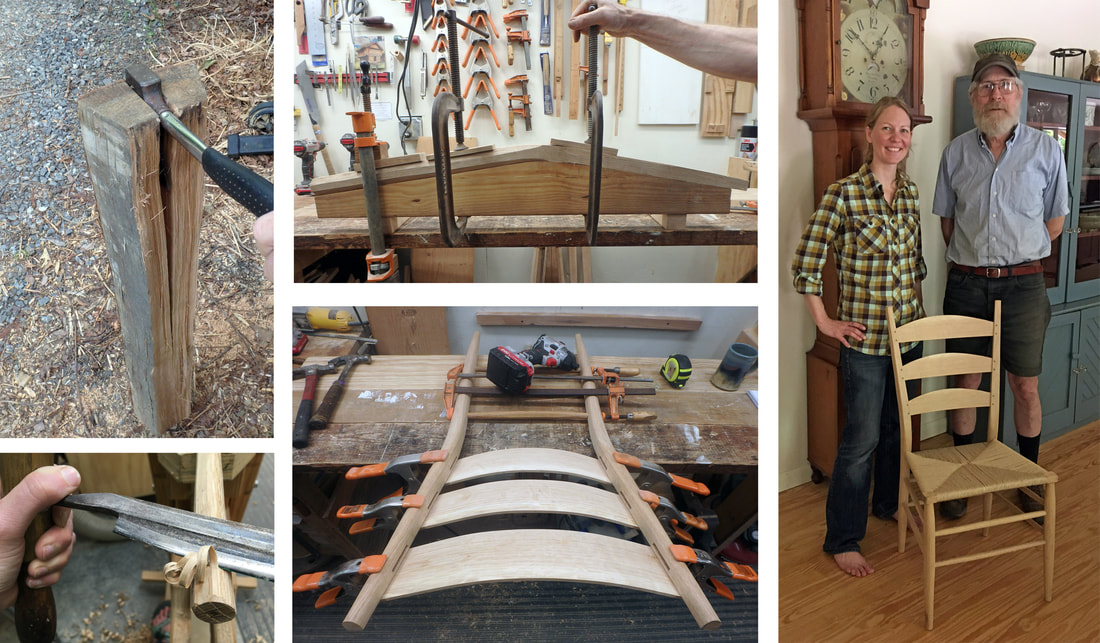
Throughout my time as an artisan, people have often asked if I’ve been certain places or met specific people based on the products they see me make. Over the past few years I’ve been compiling lists – moving places a notch higher in priority as more and more people mention them to me and becoming more interested in meeting or working with a specific person as I continue to learn how much we have in common. This past winter, I decided that my list had gotten long enough that it was time to do something about it. I had amassed a page-long list of places and people in the southeast US and I figured out a route that would take me on a big loop visiting almost every one of them. And so, in mid-May I drove away from the rocky shores and trees with branches still bare and headed towards the coves, gaps and ridges of the Appalachian Mountains, where “Boiled P-NUTS” are sold on the roadside and billboards ask “Do you have the Black Lung?” to advertise for the local attorney. My first night in Appalachia was spent with Drew and Louise Langsner at their home and the former home of Country Workshops. I was less then ten steps from my truck when Louise was already embracing me and showing me to my room upstairs in the barn. We climbed the stairs to a storage area packed full of slab wood and willow, where off to one side there were two bedrooms and a bathroom. The first room was occupied by Drew and Louise’s friends from Brasstown, NC (and frequenters of North House Folk School!), while I was shown to the second, a plain room with a lovingly worn Tree of Life quilt on the bed and screenless open windows looking over their gardens and the expansive Appalachian Mountains beyond. While I unpacked a few items from my pack basket and settled in, Louise headed down to the garden, already seeming in full summer splendor, and picked a jar-full of flowers for the porch table where most of our time that evening would be spent. Their home was as dreamy as I could have imagined – the hand-hewn dovetail log cabin was filled with handmade baskets, coopered buckets, carved and turned bowls and spoons, post and rung chairs, and books. We were a group of seven for the evening and enjoyed home-cooked food on the back porch under the spreading trees where fireflies flickered, and we talked of craft, books, movies, rural health care and Drew’s close call with jail (who knew AAA coverage includes Arrest and Bail Bonds?!). While visiting, I had the pleasure of coming across a dustpan that Drew made many years ago and has been obviously well-used as it is now almost as much duct tape as it is wood! When I commented on it and took some pictures, Drew sheepishly said that he needs to make another. I fawned over his collection of small hand-brooms, perused his collection of butter spreaders from all over the world, held spoons made by Wille Sundqvist, and chatted about the evolution of a bowl carver. My time there was full but short, as many adventures still awaited, and I drove away inspired and excited. I then visited Penland School of Crafts and Arrowmont School of Arts and Crafts and continued on to spend a few days in and around Asheville exploring the many folk arts centers and galleries. One location that was on my list was a place called Grovewood Village. I didn’t have any notes or memories about why exactly I wanted to visit this place, but there I went. As I drove in and parked, I started to get confused about why exactly I was there – I was surrounded by careful landscaping, a contemporary sculpture garden, grandiose buildings, and a fancy golf course and clubhouse….. The sign for Grovewood Gallery caught my eye, so I popped in, but was uninterested in the pricy contemporary art and polished furniture. After leaving the gallery, a small, unassuming sign on a building sandwiched between the gallery and the Antique Car Museum caught my eye – Homespun Museum. I stepped in past a sign that advertised a once daily tour at 1 pm (it was about 12:40 then). It was here that I found what I was looking for. The small one-room museum was packed full of information about Biltmore Industries, an arts and crafts enterprise that started from a small craft education program in 1901. As the story goes, while visiting Asheville for the summer, Charlotte Yale and Eleanor Vance (who had formally studied woodcarving at the Art Academy of Cincinnati) began teaching young boys from the area how to carve wooden bowls and picture frames. The local Vanderbilts then got involved and, to make a long story short, helped the school grow to include a weaving studio, which by the late 1920s employed 75-100 workers and produced 950 yards of fine homespun fabric every day. Though woodcarving and furniture building continued to be a part of the story, the weaving of homespun fabric is what brought most of the fame and fortune. Customers included Thomas Edison, Henry Ford, Helen Keller, Franklin Roosevelt and Eleanor Roosevelt and orders for the fabric came in from across the country and globe. It wasn’t until the 1980s that the last loom was taken out of service as the industry succumbed to modern weaving factories. As part of the tour, we went into the Dye House, which is partly preserved almost unchanged from the day the weaving stopped (there was even still wool in many of the industrial carders) and is partly a warehouse-like dumping ground of all the disassembled loom parts and unused equipment. What a unique little gem in such an unexpected place! And I love that it all began back in 1901 with a woman teaching woodcarving! Though I did wonder why, according to the information I read, she was only teaching woodcarving to the boys… The next part of my journey took me to Brasstown, NC, home of John C. Campbell Folk School and a small mecca of highly skilled craftspeople. I was there to spend a week with Tom Donahey, who is a master chair-maker and general woodworker of all sorts. Tom is one of the reclusive geniuses of the craft world who is nearly unknown in the technological world of the internet and social media. Now days, all his chair clients are through word of mouth, and he has no interest in having an email address or posting anything online. When I was an intern at John C. Campbell a little over two years ago, I spent a week with Tom building one of his chair designs, which he refers to as a “Classic Mule Ear,” a post and rung chair that is an upscale version of Jennie Alexander’s “Peoples’ Chair.” I left my last chair-making experience with my chair and a chair-stick (a measuring tool with marks along it referencing the locations of all of the tapers, mortises, and angles found on a chair), which in theory was all I needed to go home and make another. It’s the “in theory” part that got me good. I was in need of a second round. Tom and his partner Linda warmly welcomed me into their home (which I played a small role helping build back in 2014), and for a week Tom and I worked in his shop, not only building chairs, but making notes, drawings, photos, videos, and talking some pretty deep chair and wood theory. We spent our time splitting out chair pieces from an oak log, steam bending rear posts, using spokeshaves, drawknives and sloyd knives to shape pieces, and whacking things together with heavy mallets (and I won’t deny that we did also use some power tools). Most people who build a chair with Tom just want to build a chair, so I think my questions and view points were refreshing to Tom since they came from a place of not only wanting to replicate what we were doing but wanting to understand why we needed to take the steps to do what we were doing. In the process of building these chairs, one of the steps is to put the rungs in a kiln to drive out moisture thereby reducing them to their smallest possible size, so once seated in their mortises, they will expand and create more permanent joinery. As a result of thoughtful conversation, we decided to test to see how long it actually takes a kiln-dried rung to expand back to full size. Tom has always felt a certain amount of haste was necessary when assembling the parts of a chair because in his mind, the rungs would start expanding as soon as we took them out of the kiln. So we took one out, measured it to ten thousandths of an inch both along the rings and across the rings, and put it aside to check again every few hours. We found that the growth in the first six hours was negligible and that it took almost two full days of the rung being out of the kiln to reach full-size in the humid Appalachian climate. So now we know we can take our sweet time (which was useful knowledge as Linda came in to visit just as Tom was assembling his chair and he didn’t need to get stressed!). The rest of the week was filled with similar testing and idea swapping, and I left with a chair, another chair-stick, 35 pages of handwritten notes, and my mind filled with all sorts of new understanding about wood and carving and life. I even got a farewell supper of squirrel stew, maybe not quite as Appalachian as opossum stew, but it did the trick. With my belly full, I traveled on to Berea, KY, home of Berea College. Since 1859 Berea College has had a unique approach to higher education, having the goal of making it more accessible by having students participate in work-trade for their tuition. One department where students can work is Student Craft, where they can participate in woodworking, broom making, weaving, or ceramics. Upon arriving on campus, I stopped by the Log House Craft Gallery, which sells crafts made by students and other local artisans, before walking across a field to the building that houses the woodworking and broom making programs. Being summer break, there was only one student working in the broom shop, which normally employs up to ten students. Chris, who runs the broom making program, was there in the shop, and he gave me a tour while we talked more about how the Student Craft department works and the business of broom making. It is my understanding that the Student Craft department has been facing some challenges as administration is trying to focus on more “relevant” ways for students to contribute and gain skills for life in the modern world, and as it loses money on the high overhead and declining sales. Amidst stories of struggle, however, there were also some hopeful stories. The woodworking shop, which in the eighties largely converted to CNC machines and plywood construction, recently built six shaving horses, and it is now not uncommon for visitors to the shop to see student working with spokeshaves, shaping parts for use in stools or baskets. It was really interesting to learn more about this program and see traditional craft in a college setting, and I’ll be interested to continue following the evolution of Student Craft. They have a great Instagram feed @Berea_College_Crafts for those interested in following this program. I had many other amazing experiences, learning from makers, gaining inspiration from museums, and conversing about craft, philosophies and lifestyles, but I’ll spare you the rest of the details for now!
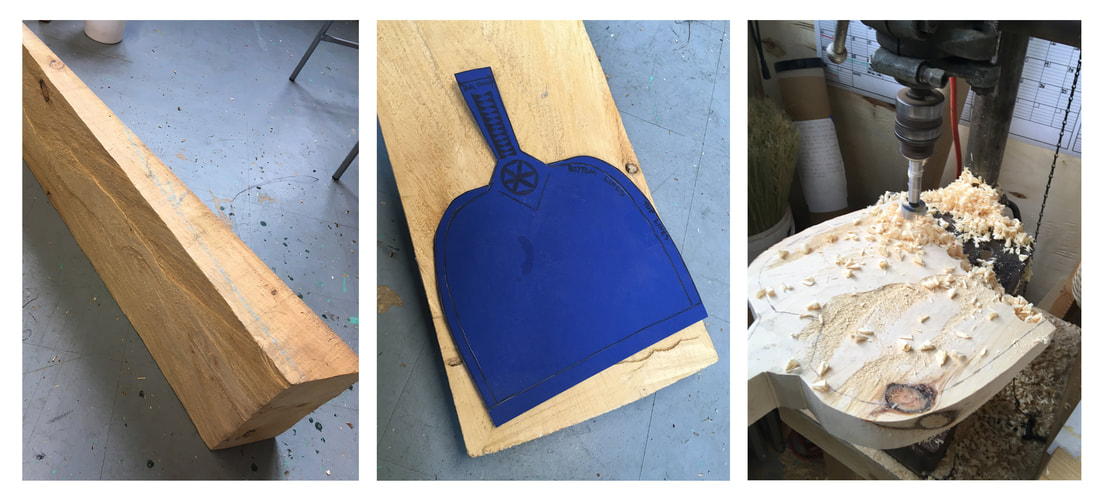
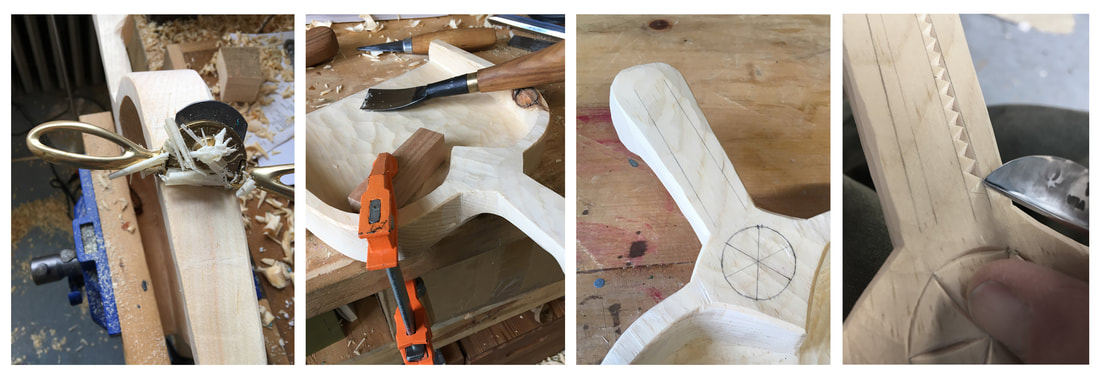
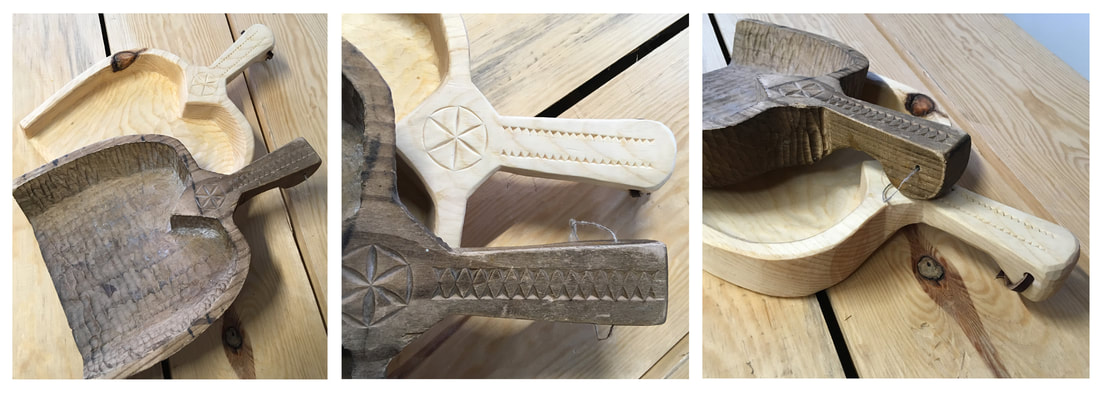
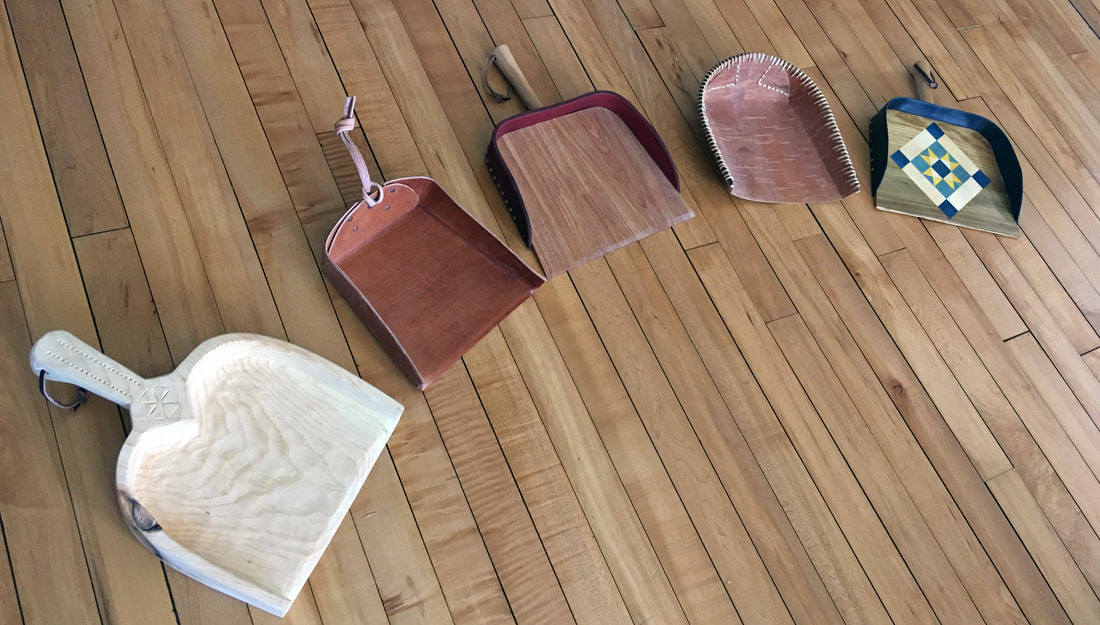
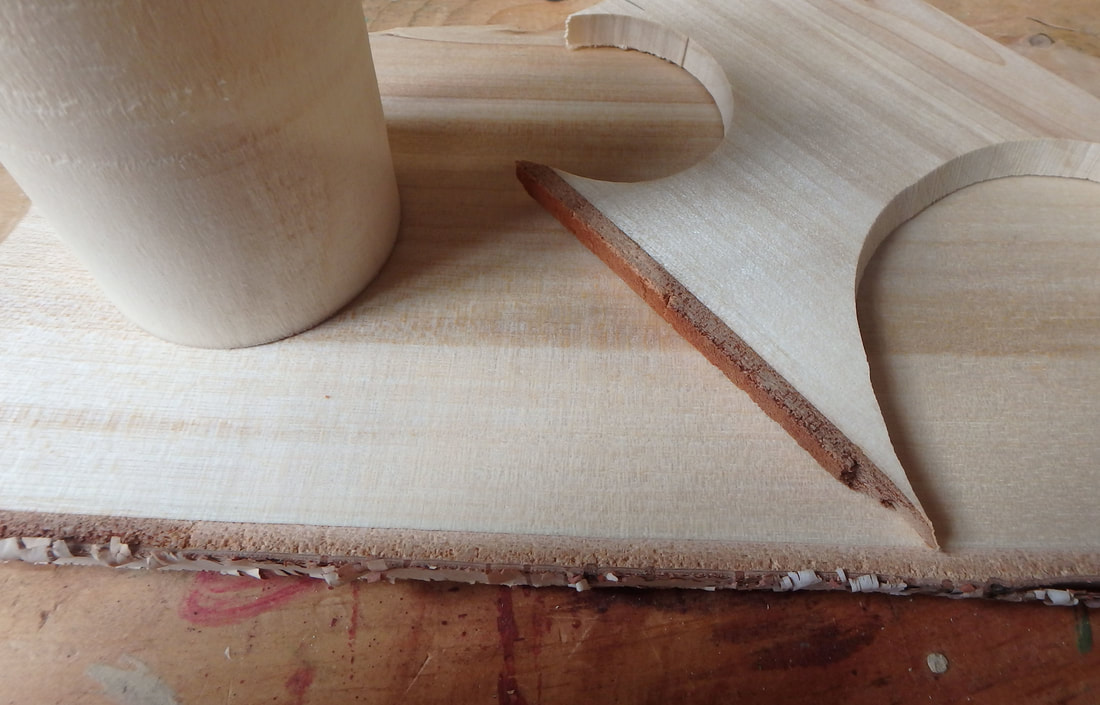
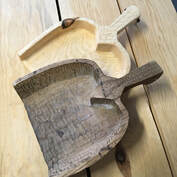 By far the most common question I get while demonstrating or selling brooms is “how long does it take you to make a broom?” Many artists and craftspeople cringe at this question. If I dare to answer, I can almost see the equation happening in the questioner’s head, figuring out how much I’m paying myself per hour while not considering material input, studio rent, festival fees, liability and property insurance, transportation costs… I could go on and on. Sure, some people really are just curious, but it is a hard question to answer and I usually start my answer with a story: “Well, it all starts on a winter morning in early February when I strap on my snowshoes and walk into the forest near my home, ax and saw in hand. I carefully select saplings that are what I think of as the right size for broom handles, dig down through the snow…” By this time the attention span has wavered, as it becomes obvious that the simple answer of a specific number of minutes or hours that they were looking for is not going to come. This leads me to one of the next most common questions I’m asked, often from people who are actually purchasing a broom. The question comes in person, through email, the comment form on my website – it finds its way to me through many different channels and in numerous forms and is simply “now what do I use as a dustpan?” Most dustpans out there are plastic. There are a select few that are made from various sheet metals that are at least not plastic, but at best still not the most aesthetically pleasing and very rarely handmade. And so, just as Quaker Oats introduced Aunt Jemima Syrup, the broom-maker began a foray into handmade dustpans. Since the question arose so often for me, I had spent a fair amount of time on the internet researching handmade dustpans. The internet is a vast place where people can generally find everything they desire, but handmade dustpans are almost entirely limited to a Japanese version made from washi paper. For the past few years this quandary of how to provide handmade dustpans has been swirling around my mind. After one conversation, my mom even tried to convince my dad that dustpans were his calling – I don’t think he was convinced! I was excited that venturing into this realm would be a connection between woodworking and broom-making, but was also intimidated by the time, tools and materials input that would be required to design, test and start marketing them. And here enters a Career Development Grant through the Arrowhead Regional Arts Council. Dustpans as art?! Well, apparently I convinced them because my application was funded and the journey has been memorable thus far. The last six months has been filled with conversations with former teachers and mentors, learning new methods, working with new materials, or old materials in new ways, and plenty of sweeping to test out the functionality and durability of my designs. 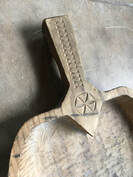 One of my prototypes is based on a dustpan that is hand-carved from one piece of wood – likely pine. Another North House Folk School instructor caught wind that I was interested in dustpans and generously lent me this gem. I traced it, took photographs, studied the tool marks, and pondered for weeks. And then I felt guilty for how long I had it in my possession and returned it. About a week later, I was poking through a pile of offcuts from a timber framing class and pulled out a piece of wood that told me it was meant to be a dustpan. I took it back to my studio, traced the outline onto the wood, cut it out, and got going. I could have removed the material from the inside with an adz or gouge, but I decided on the easy route and took it to my drill press with a Forstner bit mounted in it. Next time, I’m planning to try an adz! Then I took what was now starting to look like a dustpan to my workbench where I finished hollowing out the inside with a gouge and shaped the outside with a carving knife and spokeshave, working the handle until it fit nicely in my hand and being sure to bring the edge down to a fine taper for ease of use. Then it was time for decorating! I toyed around with the idea of creating my own design for the handle but settled on a design very similar to what I remembered from the original. Future renditions will hold more of my own voice, but I chose to look at this one as an approximate reproduction. After finishing, I had no idea how close I had come to the original. I hadn’t looked at photographs while I was working on this reproduction, and no longer had the original in my possession. So, I asked to borrow it again, and had fun comparing the differences in design, tool marks, feel and function. This is the dustpan that I consider most traditional, and also the one that excites me the most. I’ve been working on numerous other designs as well: wood combined with leather using a laminated base, birch bark, all leather, and a version with wood and leather with marquetry (the piecing of wood veneers to create designs or images) on the base. I am still hoping to explore a sewn leather version and have a few more ideas cooking, but I am so excited that now I have an answer to the question “now what do I use as a dustpan?”
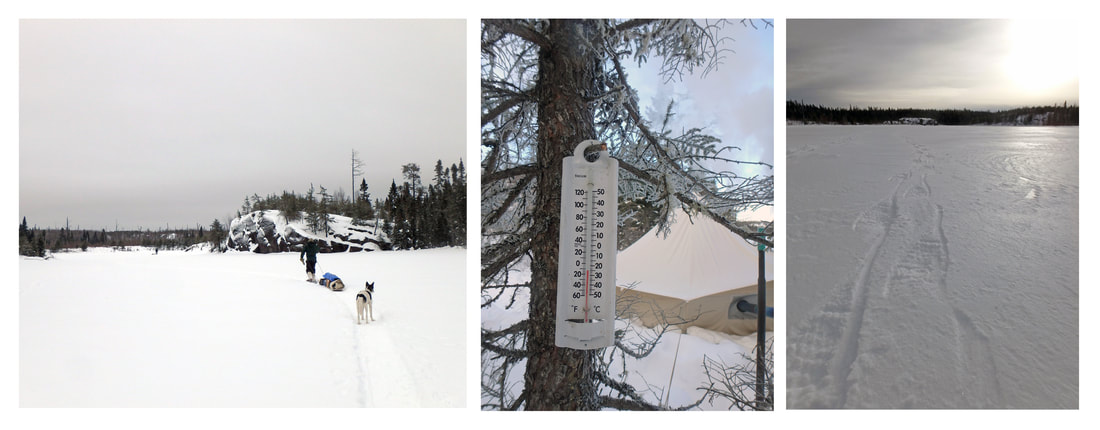
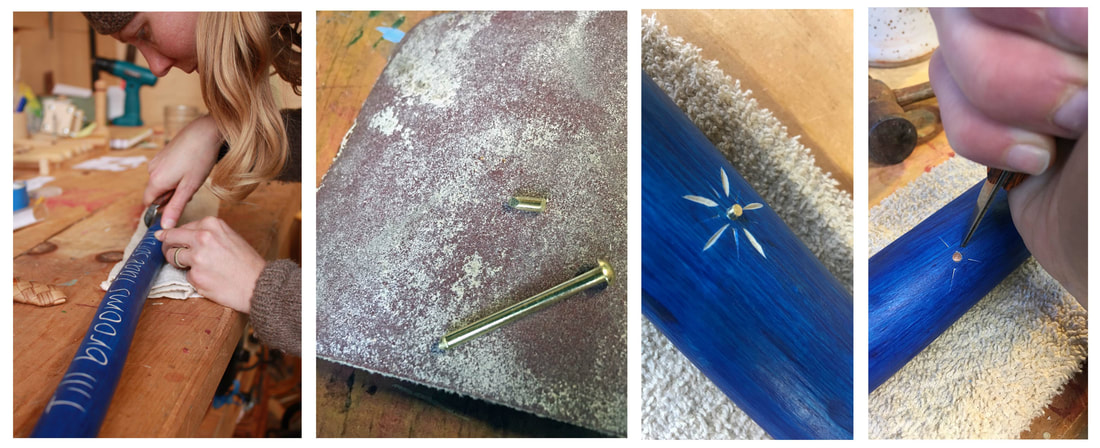
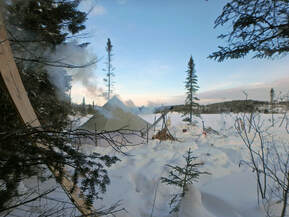 As I’m writing, I’m sitting in my small cabin next to a crackling wood stove with a mug of steaming tea and almost all that can be seen from my windows right now is heaps of snow that have been shoveled from my drive or fallen from my roof. I enjoy these quiet mornings, where looking around my home I see countless useful items that I have made or that have been made by friends – of course the expected broom hanging on the wall, the stack of wooden bowls and plates, the jars filled with wooden eating spoons and cooking utensils. But so much more as well – hand forged ladles and knives, cutting boards, ceramic mugs, bowls and bakeware, quilts, hats and mittens, mukluks, the list could go on and on. It is important to me to have traditional craft and handmade items as such a ubiquitous part of my everyday life. For me these items are not simply curiosities, quaint reminders of the past set around as conversation pieces. No, for me these are the things that I rely on to keep my everyday life moving smoothly, the things that are crafted locally and sustainably, the things that will outlast and outperform anything that is available at most stores, and the things that for the most part, once their useful lives have come to a close, can be tossed out my door to resume their position in the cycle of life. Time in the studio has been ample on these chilly and windy winter days, and though I am grateful for the time to create, it is also so important to get away from that space and to renew inspiration. So in early January, I set out on a six-day winter camping trip into the Boundary Waters with two fellow North House instructors, two boatbuilders and very experienced backcountry travelers, and two naturalists. Among our gear was a large proportion of hand-made items that we would literally be depending upon to keep us alive and well. As with the things around my home, these are items that I or my friends have crafted with the intention to use, and experiences such as this put them to the test. As we were packing up our handmade toboggans, I made a mental list of all of the handmade items that were heading out into the wilderness with us. This list included a 12 foot diameter snow walker tent, numerous pairs of snowshoes, toboggan bags and other totes and duffels, knit hats and mittens, beaver fur hats and mittens, a wanigan holding our cookware and food, much of which was hand-harvested such as venison sausage, wild rice, blueberries, maple sugar and jerky, wooden bowls and spoons, whisk brooms for brushing snow off of people and out of tents, mukluks and choppers sewn from brain-tanned hides, felted boot liners, beeswax candles, ice spuds, knives, knife sheaths, and I’m sure so much more that escaped my attention. 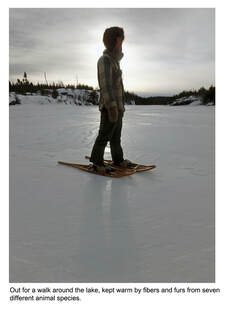 Once at camp, half of the group snowshoed away each morning to drop lines through holes in the ice, while the rest of us cut and chopped fire wood, watched and listened for the few bird species out and about, followed martin and snowshoe hare tracks, and hiked around, learning the surrounding lakes, forests and ridges. While out exploring one day, I started thinking about what I was wearing to keep me warm and was able to count up seven different species that were contributing to my survival! Beaver (in the form of a hat); sheep, dog and alpaca (in the form of knit mittens and neck gaiter and much more wool in pants, shirts and sweaters); silkworm (in the form of glove liners); moose (in my mukluks); and whatever ungulate (maybe a cow?) contributed to the rawhide lacing of my snowshoes. Our gear held up through snow, cold, high winds, and slush, and I already have a list going of all the other things that I want to make before the next winter camping trip. Experiences such as this, which get me out of the studio, do so much to keep me going both physically and emotionally. They solidify my faith in this handmade lifestyle that I have chosen to pursue and serve as inspiration for carving on my next bowl or broom handle. I’ve already started a few projects that were inspired by conversations, sights or feelings experienced during this quiet winter journey into the Boundary Waters, and perhaps I’ll write about them in a future post. She sweeps with many-colored brooms, And leaves the shreds behind; Oh, housewife in the evening west, Come back, and dust the pond! You dropped a purple raveling in, You dropped an amber thread; And now you’ve littered all the East With duds of emerald! And still she plies her spotted brooms, And still the aprons fly, Till brooms fade softly into stars - And then I come away. -Emily Dickinson I was introduced to this poem through the music of Josephine Foster, who has an album completely devoted to the poems of Emily Dickinson. Since one of my more well-known craft focus areas has been broom-making, this poem understandably grabbed my attention. The words of this poem, in which Emily Dickinson uses a sweeping housewife to describe the sunset, have been swirling around in my mind for the past few years as I’ve pondered how to incorporate this into broom-making. My mentor in the Artisan Development Program (in which I am currently participating at North House Folk School), Dennis Chilcote, who is also a broom-maker and has added some beautiful carving to broom handles, challenged me a few months ago to broaden my vision of artistic brooms by making brooms worth more than one hundred dollars. A few ideas have come to mind since then, but the one that has excited me the most has been the opportunity to incorporate “She Sweeps with Many Colored Brooms” into a series of twelve brooms. Tackling one line at a time, I’m working to create a visual representation, either figuratively or literally, onto each handle. I am then carving the line of the poem into the handle using free form chip carving methods, which I’ve also been using on my recent shrink box projects. The first handle that I completed is “Till brooms fade softly into stars –“. This handle I first painted with a deep blue oil paint to represent the evening color after the sun has set and the red and orange have faded from the sky, but before it is fully black. I then carved the words through the paint and finally created my stars. For this, I used a method that Jane Mickelborough showed me at the Milan Spoon Gathering, and which I used in a couple spoons that I carved in her class. Using brass and copper tacks, I cut short lengths, sanded them down, and tapped them into pre-drilled holes in the handle. I then used a combination of chip carving and a stab knife to add lines to represent sparkle around each star. I finished the handle by painting light gold into the carved letters and chip carving around the stars. My plan with this handle is to tie a broom onto the end that incorporates dark blue broomcorn fibers along with yellow or gold crosses over the blue string used to tie the broom flat. So far, I’ve completed three of the simpler lines of the poem and have lots of fun and more intricate ideas for most of the other lines. I love that this project is allowing me to experiment with a variety of carving and embellishing methods, as well as new paint types and techniques. I’m not sure exactly where the final products will end up or how this project will factor into my identity as a broom-maker, but I appreciate that the Artisan Development Program is allowing me the time to follow my whims and work on projects like this.
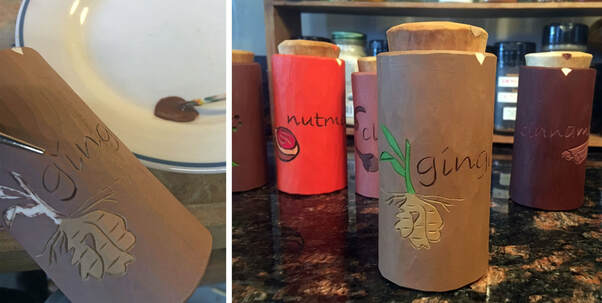
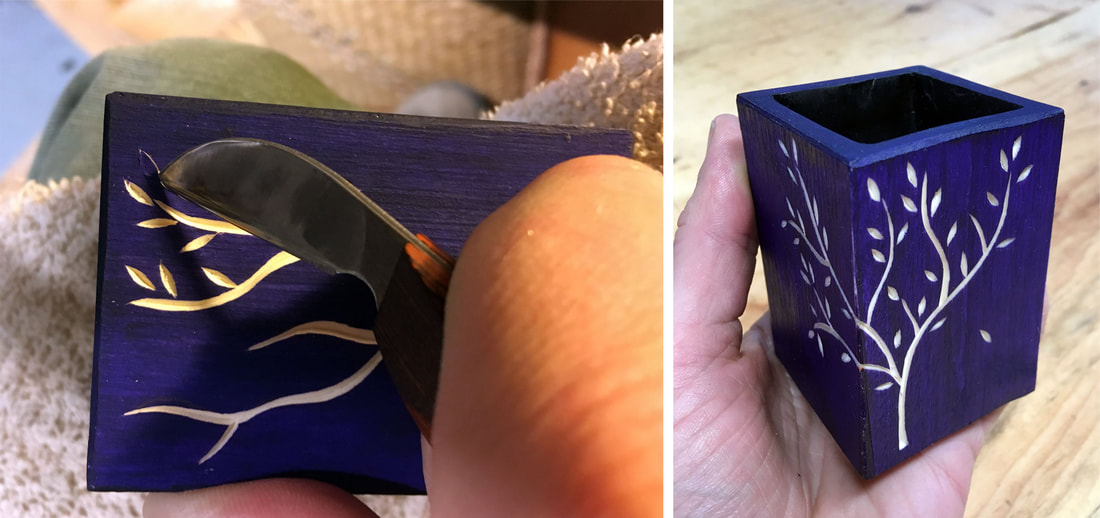
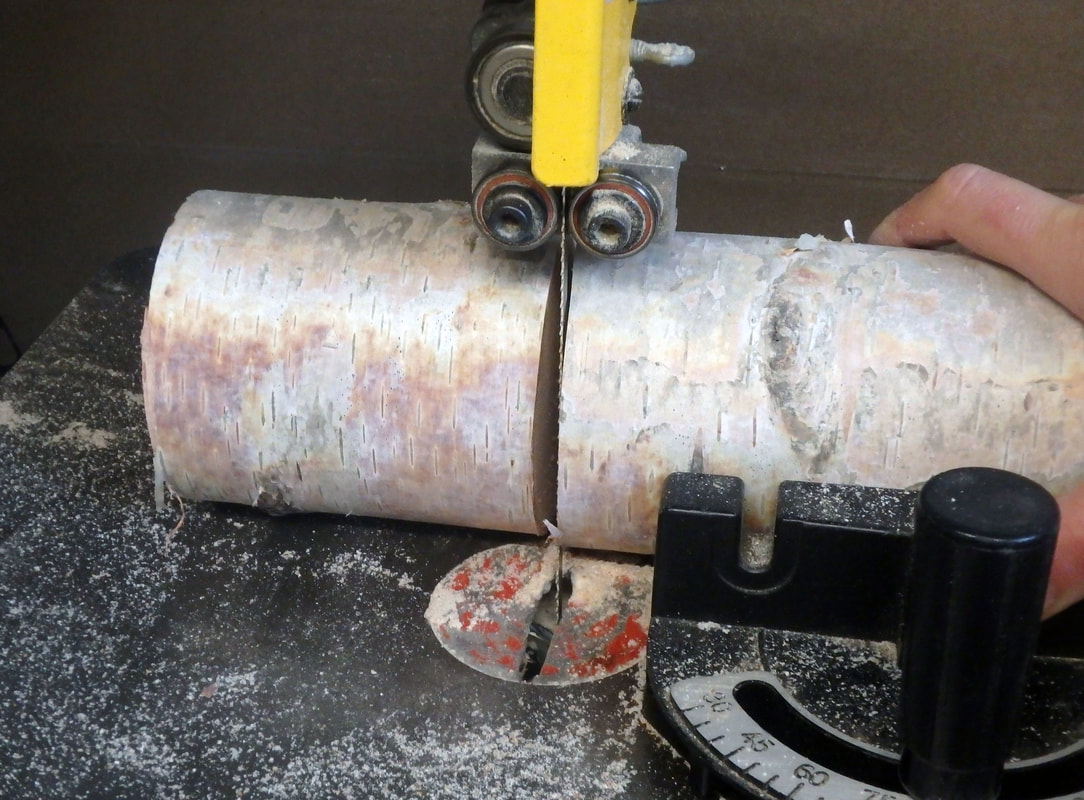
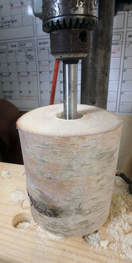
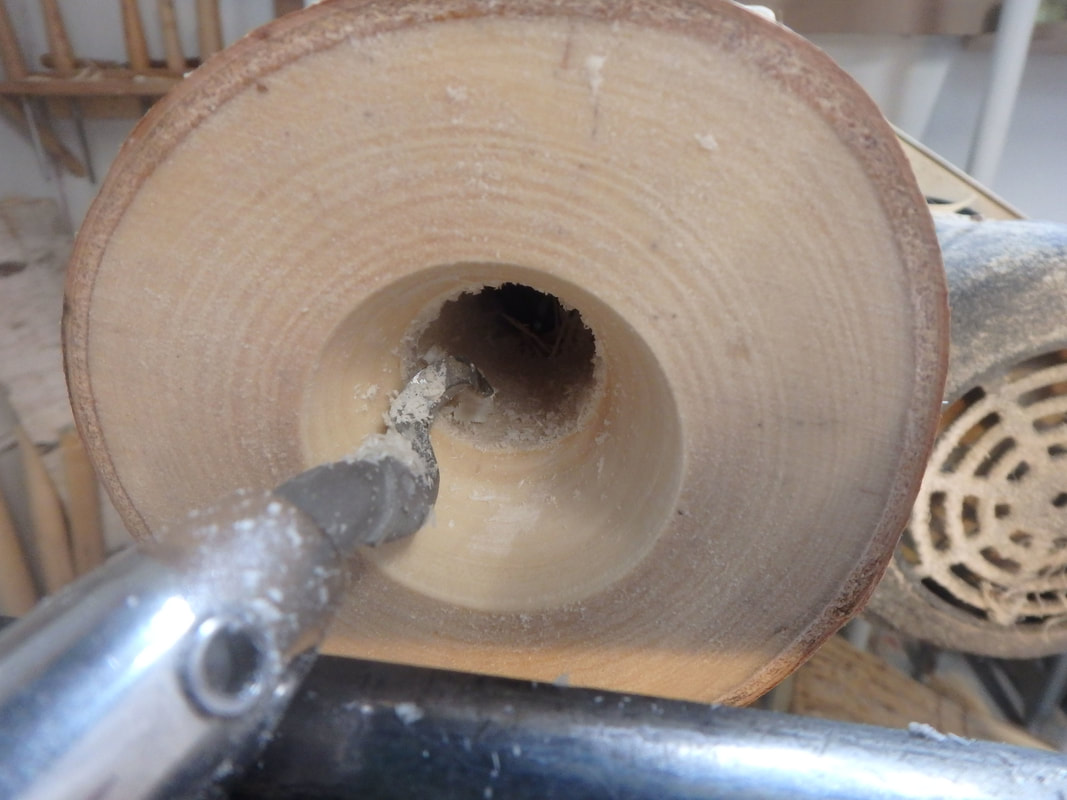
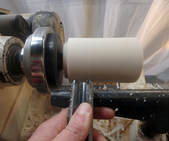
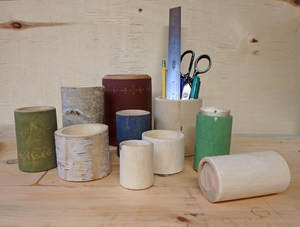
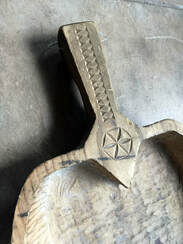 Surface design, be it carving or painting or inlay, is fascinating to me. Just a simple embellishment can bring an everyday item from being strictly utilitarian to the status of usable art that can be enjoyed both while in use and while being stored on the shelf or hanging on the wall. I’ve lately been delving more into the world of surface design, focusing over the past month on freeform chip carving and various painting techniques. Chip carving is generally defined as a method of carving in which one makes angled cuts into the surface of the wood which results in clean chips being cut away. The chips are removed in such a way that a form or pattern takes shape, often quite geometrical in nature. This picture of an old wooden dustpan that was lent to me (and which I hope to replicate sometime soon!), shows two typical chip carving patterns that are often repeated in traditional Scandinavian chip carving. Though there are examples of a huge variety of chip carving methods and techniques from around the world, this one was common in Scandinavia during the 1700s and 1800s as a method to decorate chairs, tables, clocks, spoons, and many other household items. A quick online search will give you an idea of how intricate some of these designs can get and will likely lead you down a rabbit hole! One of the things that I love about this method of embellishing work is that it generally only takes one or two small knives to achieve a huge variety of shapes and patterns, so it is extremely attainable for those with limited budgets. Although I’m intrigued by geometrical styles of chip carving, I’ve been mostly exploring what is referred to as freeform chip carving, which generally takes the form of long flowing lines combined with smaller shapes to create designs that mimic the natural world such as plants, animals or really anything you could imagine. I’m still on the shrink box journey that I wrote about in my last blog, and these little containers are the perfect project with which to explore chip carving. Over the past couple weeks, I’ve been making a bunch of spice jar sized shrink boxes and I am now using chip carving to add the name of the spice and an image to each jar. Below is a series of photos showing the methods I use for carving into these little containers. After penciling the design, I use the chip carving knife to slice out long smooth cuts, doing my best to meet the bottom of each initial cut with a paired cut that leaves a clean line in the wood. Tight corners are still challenging, but it’s fun to push the limits. After finishing the carving, I get to explore paint and color. I’ve been working with milk paint, acrylics, and oil paint to learn about the various finishes and methods required to achieve the look I’m trying to obtain. I’ve been having a lot of fun mixing colors and using teeny tiny little brushes to fill in the letters and images. I’ve been called crazy by numerous people so far, but I just love painting the little details while sitting in the studio listening to music or an audio book. In addition to my ongoing spice jar adventure, I’ve been continuing to play around with different forms of shrink boxes. I want to make square or rectangular ones for storing loose tea, so I made a small square shrink box as a test run on how to hollow it out and how to cut the groove for the base into the very corners of the box. With my trial run finished, I had a little box that was in dire need of some chip carving decoration. I wanted to try out the method of painting the box first, then carving through the paint so the bare wood creates the pattern. I painted the box in a deep purple-ish blue then carved the image of trees through it using the combination of long smooth curves and smaller pointed ovals. Though there were no tiny details for me to paint with my little brushes, I really like the results and plan to continue exploring this method as well as many more. Summer is quickly winding down, the colors of fall are covering the hillsides, and my wood stove is again warming the chill from my cabin’s hand-hewn timbers. With the cooler weather and shortening days, I’m finally finding more time to hole up in my corner of the studio and play with the ideas that have been floating through my mind all summer. To further my skills in embellishment carving, one of my main goals while in the Artisan Development Program, I’ve decided to spend some time in the world of shrink boxes. Though many people in the traditional craft world are familiar with these amazing little containers, many are not, so in a nutshell, these canisters are created by hollowing out a recently cut log, cutting a groove on the inside of one end, and popping a base made from a dry piece of wood into that groove. As the hollowed log dries, it shrinks around the dry base and creates a tight seal. Carve a tightly fitting lid and you have a perfect container for various food items, storing craft supplies, or whatever else you can imagine. Since my main focus with these containers is embellishing them, I’m trying to find some ways to make the process quicker so I can break out my chip carving knives and gouges for relief carving and explore to my heart’s content. 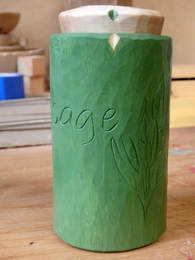 After felling a small birch tree, I take it back to the shop to cut to length. The project I’m currently excited about is creating a set of spice jars, each with the name and image of the spice carved into it. This sage spice jar is the first I’ve completed and I’m planning to try out different fonts, various carving methods, multiple lid styles, and a variety of paint combinations throughout this project. I like the approximate size of 3 ½” high and 2” in diameter for a standard spice jar but may go bigger for the ones I use a lot and smaller for the ones I don’t need much of. After cutting the log to length, I take it to the drill press and drill a hole through the middle with a forstner bit This allows me to mount the log on the lathe using expanding jaws that fit within the hole and widen to hold the log in place while I turn the main form of the shrink box. End grain hollowing can be more challenging for me than some other styles of turning, but the initial hole made by the forstner bit creates an easy start to further hollowing with a hook tool. Once the inside is widened to about 1 ½” I use a skew chisel to create the groove that the base will fit into. By hand this process can take some time, but on the lathe it can be completed in seconds. After the inside is complete, I take the outside down to my desired 2” diameter with a spindle roughing gouge, not being too concerned about the finish it leaves because I will later carve the shrink box for a hand tool finish and more desirable surface for the embellishment carving. To create the base, I pull out some thin slabs of birch that I rived out and planed down a couple years ago when I first explored the world of shrink boxes. I trace the inside of the box onto the thin piece of birch, cut it out and carve the edges down to fit into the groove that I created. Then I POP! the base into its groovy home and set it aside for a week or so to dry out and shrink around the base. 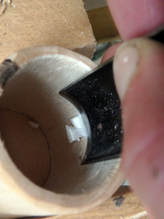 When I return a couple weeks later, I carve the outside of the box with a sloyd knife and use an incannel gouge to add a nice finish on the inside of the shrink box. This is an amazing gouge that my mentor Dennis Chilcote introduced to me and has graciously loaned to me. As opposed to a more traditional carving gouge which has the bevel on the outside of the curve, this gouge has a bevel on the inside. This allows me to run the length of the gouge straight down the inside sides of my shrink boxes, allowing me to get deeper into them with a more consistent cut than a gouge with the bevel on the outside. Then I am free to explore, using freeform chip carving, similar to what I did in the Bretton Spoon Carving class I took earlier this year with Jane Mickelborough, or relief carving, similar to what I explored with Else Bigton at the February Artisan Retreat, and with Jock Holman while serving as a class assistant in his Timber Carving class. I’m excited to see where this shrink box journey leads and look forward to the day when the conglomerate of mismatched glass and plastic containers on my spice shelf are replaced with a full set of colorful and artistic wooden containers.
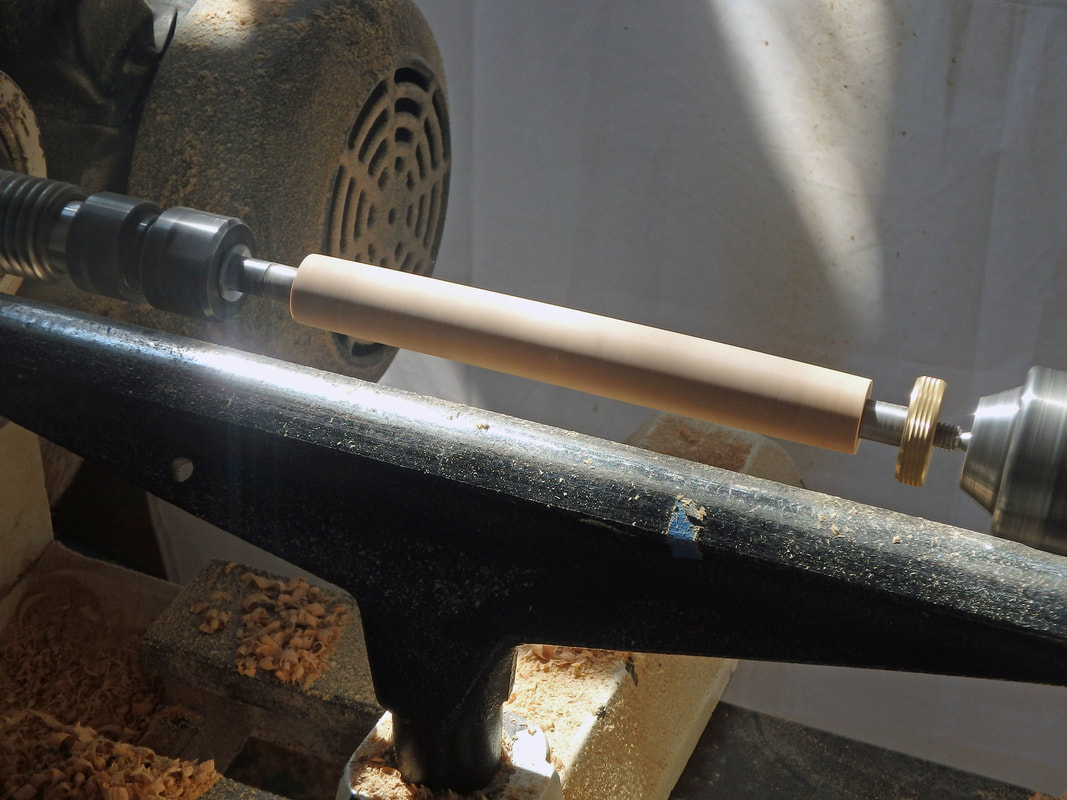
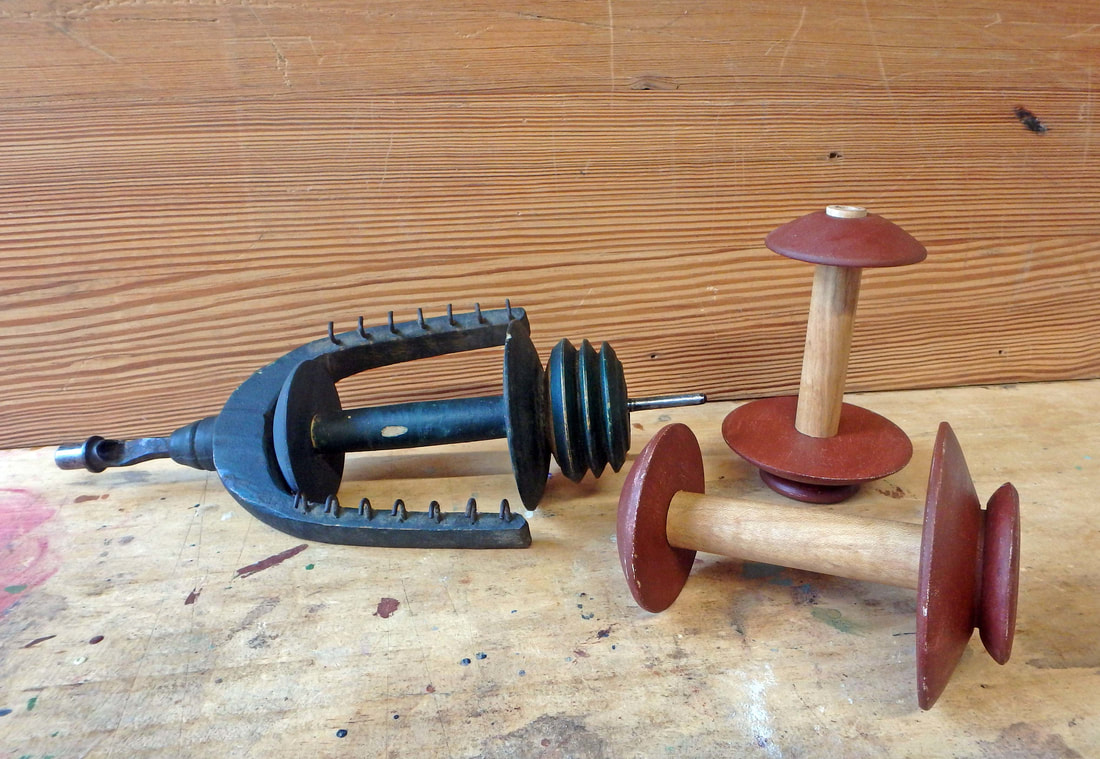
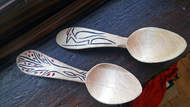
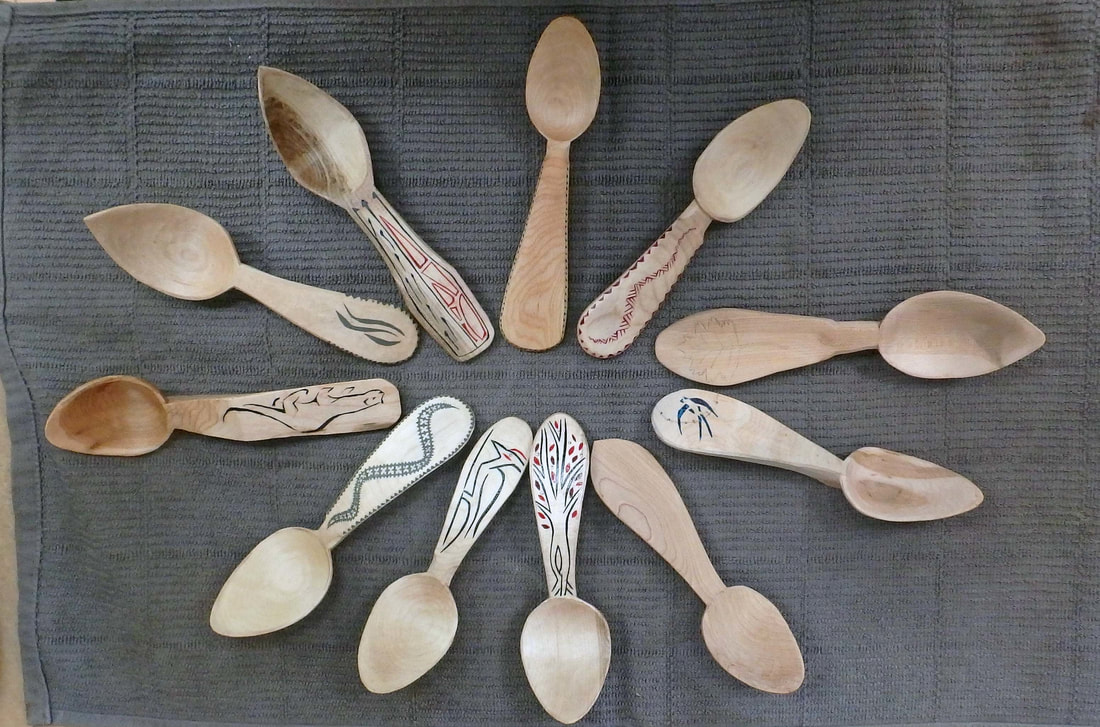
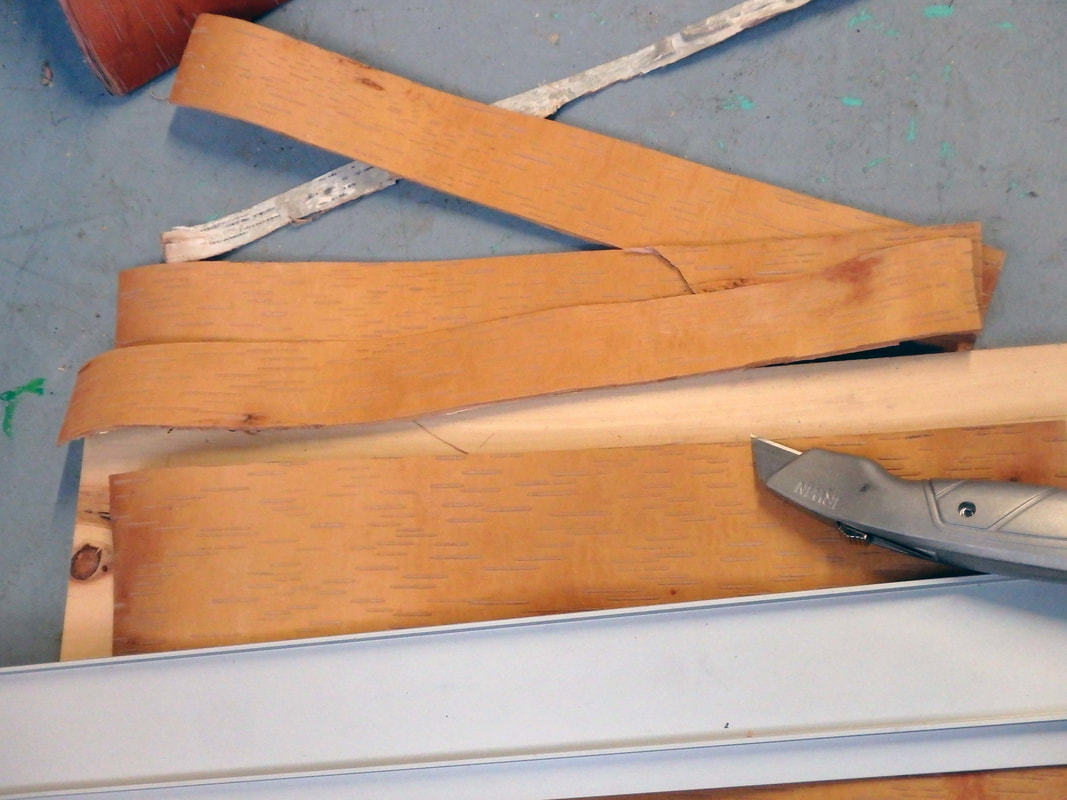
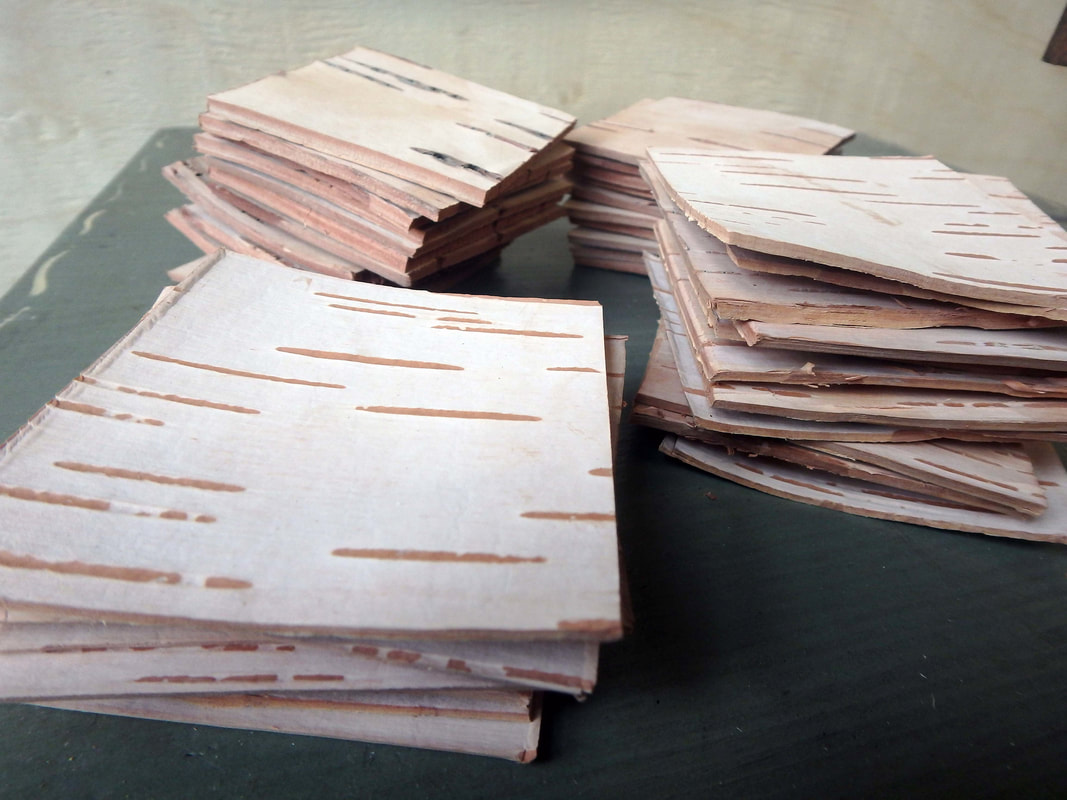
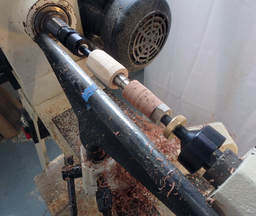
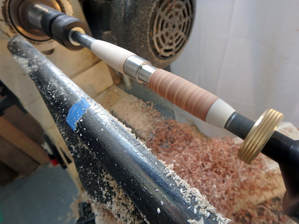
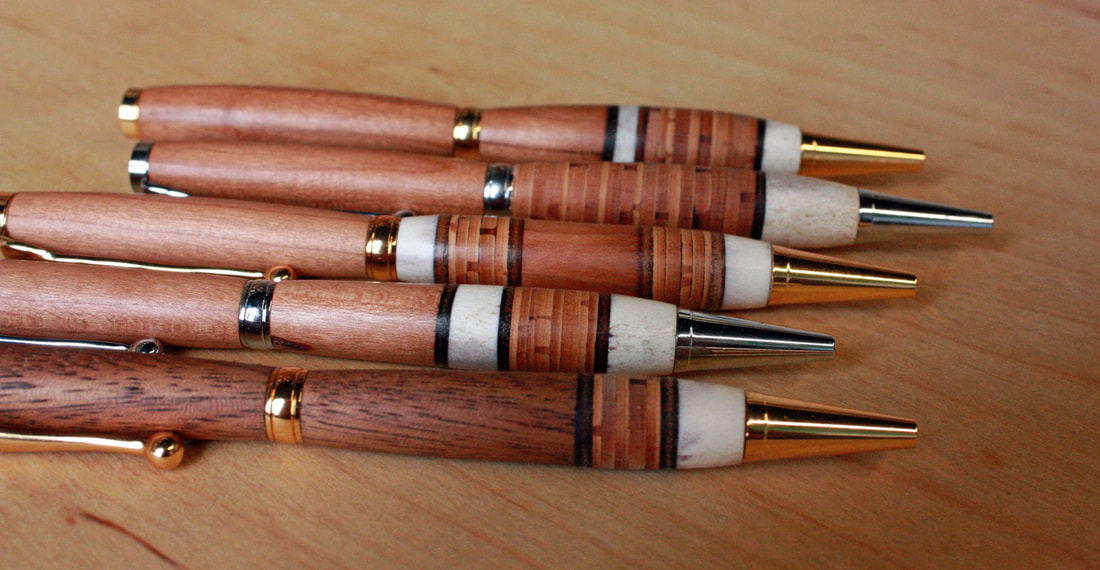
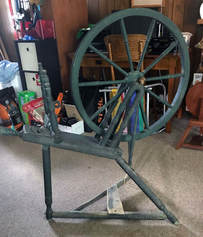 These last couple months have been jam-packed with teaching, assisting, art festivals and demonstrating. It’s the height of summer and though the days are still long, the liveliness of the North Shore is keeping them full and leaving me with little time in the studio. I was able to steal away one afternoon last week, however, to help ensure that one of North House’s spinning wheels will survive many more revolutions around the sun. The short backstory is that an antique Finnish spinning wheel was donated to North House but was in need of some loving care to get it back in working condition. It is believed to be from the late 19th century and has “P I S” stamped on the end of the bench, which could be the maker. One of North House’s fibers instructors graciously took on the task of cleaning and adjusting the wheel so it would spin smoothly once more. The bobbin that came with the wheel was missing one end, and it would be useful to have a couple of extras, which is where I entered the scene. I was sent the partial bobbin, the flyer (the piece the bobbin fits onto), and the whorl, along with a request to repair the existing bobbin and make a couple of replicas to go along with the wheel. I was excited to take on this project since it required the skills of repairing, joinery and replicating. I thought it would be a fun challenge. My first order of business was to turn a new end for the original bobbin and to get that in working order so I then had something to replicate. In looking at the bobbin alongside an experienced spinner (of which I am not), we deduced that what was left of the original paint indicated that the tenon of the bobbin shaft likely protruded past the bobbin end which would help keep the bobbin from rubbing against the flyer. We chatted a bit more about design and then I headed to the studio to turn something I hoped would work. The original bobbin was very light and likely made out of pine, so I grabbed a piece from my firewood pile and mounted it on the lathe. It was pretty straight-forward, turning a disk and fitting it to the original bobbin shaft, and a test run indicated that though the flyer is far from symmetrical, it should work just fine. Now on to creating a couple more. 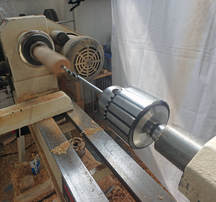 I had some long pieces of maple around the shop and decided on using those for the shaft of the bobbin and birch for the ends. Since the bobbin is longer than a standard drill bit, I dug out a long ¼” bit that I had from making lamps a while ago, mounted that in the drill chuck on my lathe and bored out the original hole. I would later need to widen the hole to fit the flyer, but with the original hole going all the way through, it was easy enough to drill from each end of the shaft with a larger bit to widen it. I then cut the shaft to length and mounted it on a mandrel to turn it down to the appropriate diameter and create the tenons on each end. The next order of business was to replicate the two bobbin ends. The end that I had already created was easy enough to replicate, but the other end had a notch for the drive band and took a few more measurements and a bit more thought. My calipers were too wide to accurately measure into the notch on the original bobbin, and with all the paint and years of gunky buildup, it was difficult to get an accurate measurement. One interesting side note: when looking at the original bobbin it is obvious that the part that rides along the whorl has been carved away a bit. I’m curious about whether this part was already a repair on the bobbin, especially since it is not painted in the same way as the other parts that I was sent. These quirks definitely made it a bit more difficult for me to be sure I was making an exact replica! After test fitting all the parts and mounting them on the flyer to ensure they would spin smoothly, I painted and glued up the whole assembly. I was specifically asked not to match the paint so it would be obvious which bobbins were the replicas and which was the original. I did want to maintain a somewhat similar aesthetic with the new bobbins, however, so I painted and distressed a couple layers of milk paint on the bobbin ends while leaving the maple shaft exposed. I’m looking forward to hearing how everything works and hope that I’ll have a chance to see the wheel in action around North House! 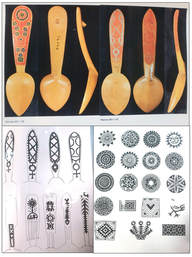 There are a lot of fun elements of the Artisan Development Program, but one of the elements I most appreciate, and will probably look back on as most memorable, is the opportunity to travel and to work with interesting and skilled people with whom I might otherwise never have the opportunity to work. When I heard that Jane Mickelborough would be teaching lead-in coursework at the Milan Village Arts School Spoon Gathering (learn more about the gathering and school here), I jumped right on board and signed up for the class. I’ve been following Jane’s adventures in the spoon world for a number of years now (check out some of her work here), and still remember the first time I saw a video of her – grey haired, strong, upright woman taking an ax to a spoon blank with confidence, power and passion. I was hooked. She emanated so many things that I admire, and I’ve continued to be impressed by what I’ve seen online, so I traveled to the spoon gathering with excitement and a little trepidation – What if she didn’t live up to my expectations? What if I wasn’t a “good enough” carver for her class that was advertised as only for “experienced carvers”? What even was this wax inlay that we would be working with – something weird and synthetic? Thankfully, I was not disappointed! We skipped right over introductions and delved into the world of Breton spoons, looking at photographs Jane had taken at museums, tracing and drawing out the profiles of the spoons we hoped to carve while keeping with the Breton tradition, and rummaging through a box filled with blocks of frozen hard maple that would soon become our spoons. 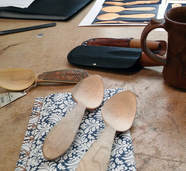 Hard woods are necessary to keep the wax inlay from bleeding into the wood, and in France these spoons would have been carved from box wood (not to be confused with box elder). We moved quickly on to ax work and carving, needing to almost finish our spoon by the end of day one so we could get going on the traditional decorative elements that really makes these spoons exciting. I was in the rhythm and feeling good about my progress, so I decided to work on two spoons side by side, each carved using a different grain direction. One of my goals in this program is to continue learning about wood movement, grain direction and how these things impact a final product, so this was the perfect opportunity to not only experience how different knife cuts impacted the two spoons, but I would also be able to learn about chip carving on the two types of surfaces, the effect of the wax inlay, and how the spoons will wear over time with the strengths and shortcomings of each grain orientation. 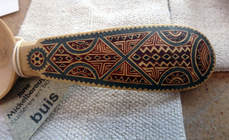 On day two, Jane reviewed the fundamentals of chip carving, talked about traditional geometric designs versus more organic flowing designs and shared what she’s explored in the world of wax inlay. Many of the spoons in museums were made hundreds of years ago, and Jane has not been able to find any recipes or information on the process of making these spoons, so many of her accomplishments have come from experimentation. For the class we used sticks of traditional sealing wax, the type used for sealing letters and bottle tops, not ceiling wax (which probably doesn’t even exist). Some students experienced initial confusion about these two very different words that sound just alike! Though now days many sealing waxes are paraffin based, they were historically made from rosin, shellac, beeswax and natural pigment. There are still a limited number of companies that manufacture the traditional waxes in many colors, and Jane also shared her personal recipe with us so we could make our own at home. We spent days two and three carving practice designs, carving our spoon handles, melting the wax into our carving, and scraping away the excess to reveal the final designs. Jane even took the time to show me a new method she was playing with – pounding brass tacks into the spoon handles, which was inspired by some designs she found on traditional Breton furniture. I played around with adding the tacks to my carvings, working with ¼” long sections of tacks using needle nose pliers and a tiny hammer, worrying all along that I was going to crack apart my spoons, into which I had already put almost 20 hours of work! I think what I enjoy most about my focus on woodturning and carving in the Artisan Development Program is exploring the ways that I can incorporate these skills into a wide variety of craft areas. I came into the program excited about advancing my fundamental skills in these areas, knowing that though I love woodturning for the sake of woodturning, and carving for the sake of carving, I get so much joy out of the idea of fitting a birchbark canister with a lid with a carved design in it, or decorating a broom handle with a carved poem, or turning a lid for a black ash basket, or adding carved embellishments to a pair of handmade snowshoes, or turning and carving buttons for a hand-sewn Scandinavian work shirt. What I did not foresee was the idea of incorporating materials traditionally used in other craft areas into turning and carving. During one of my first weeks in the program, I was hanging out in the studio in the evening, chatting with another artisan about birch bark and wanting to find ways to incorporate more of it into my work. I had recently been researching puukko knives (you can check out some examples of these knives here) and was aware of the oft-used stacked birch bark handles in those knives, and through this conversation I was inspired to attempt turning birch bark. I wasn’t quite sure where to begin with this budding idea, but as I continued unpacking and setting up my studio, I found some old pen-making materials that I had not used in quite some time. Thus began a small adventure down a little side path in my world of woodturning. I started by pulling a stash of bark from my dark cabin loft and finding the thickest pieces that didn’t delaminate easily. I then cut them into two-inch strips, and then into squares, resulting in piles of small birch bark pieces. 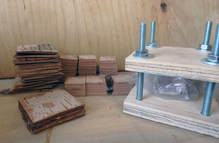 I used epoxy and small presses that consisted of plywood and bolts to laminate a number of squares together to make a stack of bark that I was hoping would have enough integrity to mount on the lathe and turn. I also thought of adding some leather, antler and wood pieces sandwiched amongst the birch bark to lend an aesthetic similar to that of some of the puukko knives I have seen. I had never turned antler, birch bark, epoxy, or leather, but could not think of a reason why any of them might not turn smoothly with sharp tools. After weeks of cutting, layering, clamping, drying, re-cutting, and drilling, I was finally ready to mount the first blank on the lathe. All of the materials involved ended up turning fairly easily. I only needed to make small adjustments to compensate for turning the very soft birch bark right next to brittle antler and stringy leather. I’ve now made a number of these, each with a slightly varied pattern of materials and using various hardwoods to achieve an aesthetic that I like. Just a fun little way to bridge the gap among varied crafts and to write on in sloyd style. |
Marybeth GarmoeCraftsperson Archives
August 2019
Categories |






 RSS Feed
