|
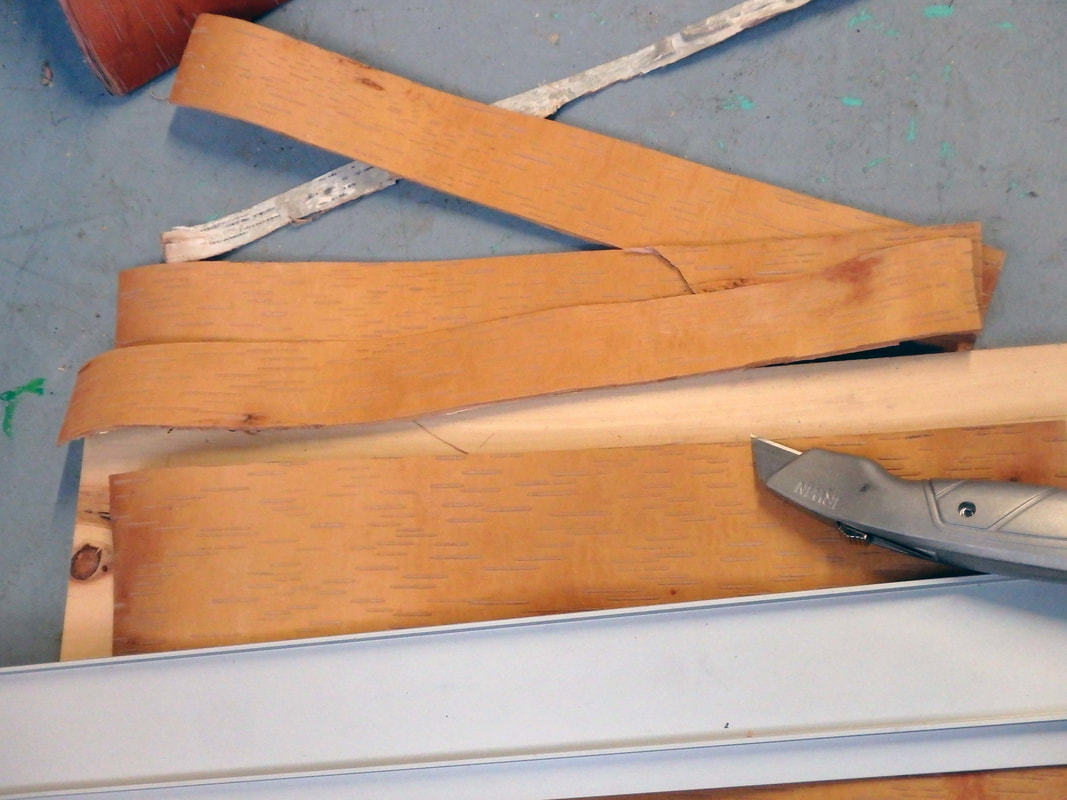
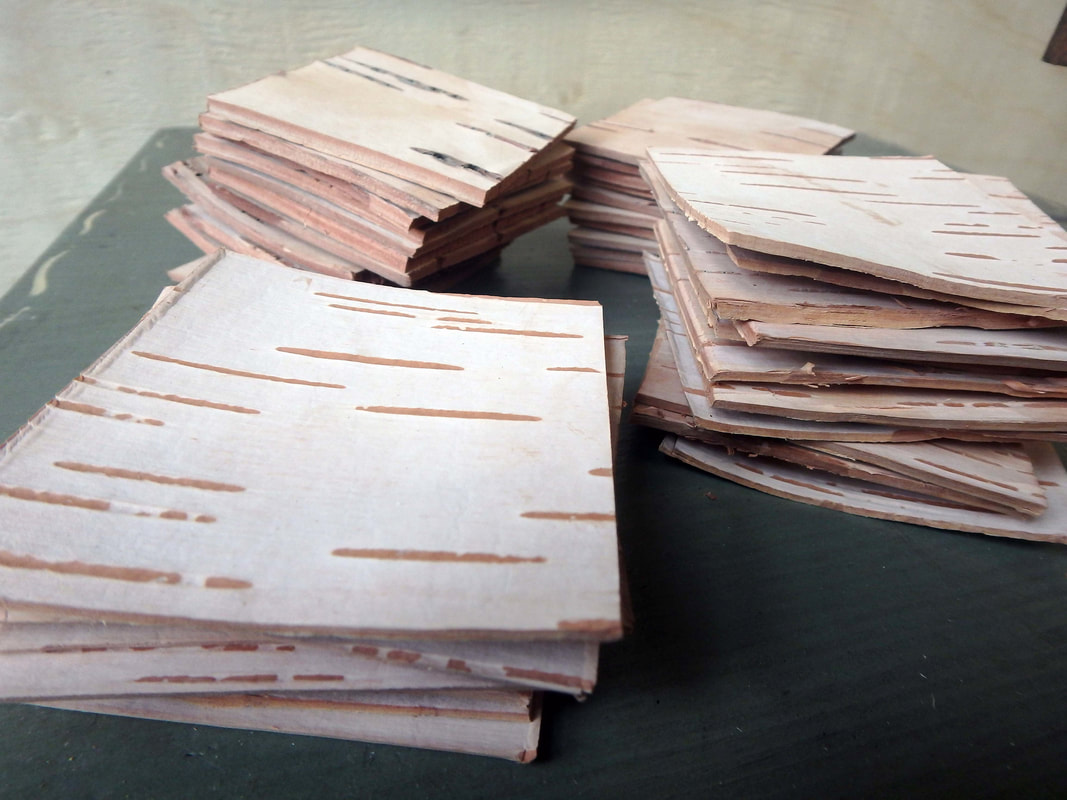
I think what I enjoy most about my focus on woodturning and carving in the Artisan Development Program is exploring the ways that I can incorporate these skills into a wide variety of craft areas. I came into the program excited about advancing my fundamental skills in these areas, knowing that though I love woodturning for the sake of woodturning, and carving for the sake of carving, I get so much joy out of the idea of fitting a birchbark canister with a lid with a carved design in it, or decorating a broom handle with a carved poem, or turning a lid for a black ash basket, or adding carved embellishments to a pair of handmade snowshoes, or turning and carving buttons for a hand-sewn Scandinavian work shirt. What I did not foresee was the idea of incorporating materials traditionally used in other craft areas into turning and carving. During one of my first weeks in the program, I was hanging out in the studio in the evening, chatting with another artisan about birch bark and wanting to find ways to incorporate more of it into my work. I had recently been researching puukko knives (you can check out some examples of these knives here) and was aware of the oft-used stacked birch bark handles in those knives, and through this conversation I was inspired to attempt turning birch bark. I wasn’t quite sure where to begin with this budding idea, but as I continued unpacking and setting up my studio, I found some old pen-making materials that I had not used in quite some time. Thus began a small adventure down a little side path in my world of woodturning. I started by pulling a stash of bark from my dark cabin loft and finding the thickest pieces that didn’t delaminate easily. I then cut them into two-inch strips, and then into squares, resulting in piles of small birch bark pieces.
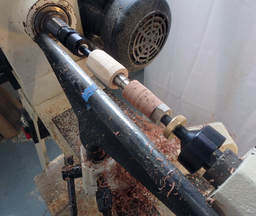
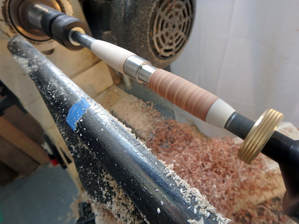
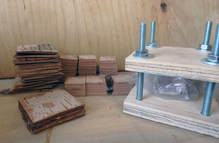 I used epoxy and small presses that consisted of plywood and bolts to laminate a number of squares together to make a stack of bark that I was hoping would have enough integrity to mount on the lathe and turn. I also thought of adding some leather, antler and wood pieces sandwiched amongst the birch bark to lend an aesthetic similar to that of some of the puukko knives I have seen. I had never turned antler, birch bark, epoxy, or leather, but could not think of a reason why any of them might not turn smoothly with sharp tools. After weeks of cutting, layering, clamping, drying, re-cutting, and drilling, I was finally ready to mount the first blank on the lathe. All of the materials involved ended up turning fairly easily. I only needed to make small adjustments to compensate for turning the very soft birch bark right next to brittle antler and stringy leather.
I’ve now made a number of these, each with a slightly varied pattern of materials and using various hardwoods to achieve an aesthetic that I like. Just a fun little way to bridge the gap among varied crafts and to write on in sloyd style. 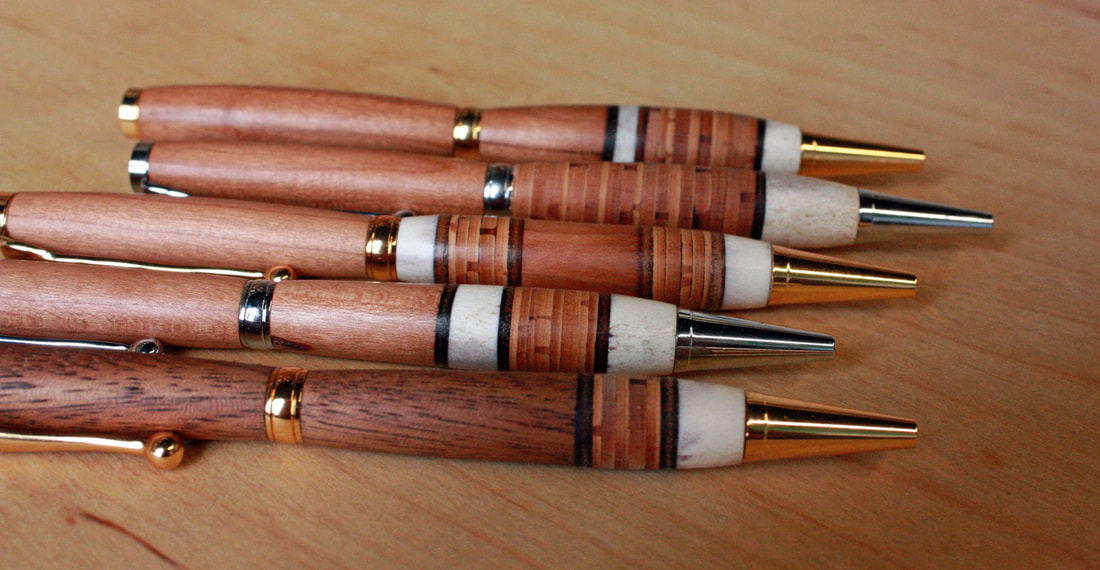
0 Comments
|
Marybeth GarmoeCraftsperson Archives
August 2019
Categories |
 RSS Feed

Follow on social media!
